Thursday, December 26, 2013

Infinity Mirror - now redone

Some time ago I had posted the project as soon as I gave it a try. Now I found time to redo this with what was still needed to be done.  The light strip had been measured short.  I bought half a metre more of it and soldered it to the terminals and fixed it to complete the perimeter.  I had also wanted to add some colouring. I had some colour transparency sheet pieces.  This came in handy. I cut up small strips of the three colours I had and taped them at intervals. Closed the glass back. It is dust season now. When light is put on, all the dust trapped in it gets into view! 


Close-up.


Finished project.  Colouring is pleasing I feel.  


Close up of the infinite reflections. 

Sunday, December 22, 2013

Sand bag paper weight


  I took a thick cloth and made a bag [see picture], filled fine sand and stitched it close.  That is, in short[est], about this little project!

Lo, it is a soft paperweight , a very essential item on the office desk covered by glass. Visitors to the desk pick it up and ask me what it is!  My paperweight does not crack the table glass now.

I must tell  a bit about that sand.  

From my younger days, I had seen two large bottles [a foot tall] in the kitchen in which cooking oil was kept. I remember one of them had a leak because it had a fine crack. It was discarded for storing oil and dumped in the store room.  The next I remember was sand in it, may be it was transferred from a tin can for some reason by my mother who also later told that the sand was brought from the beach of Rameshwaram, the sacred coast town near the southern tip of India. I still wonder what was the purpose of its being brought here. 

With the changes in the house that came along over the years, it was kept here and there as it was actually useless at it were.  The last stop for his sand bottle was my garden.  It was kept under some stone bench along with some other junked items.  One day when I was clearing up the items, there it lay cracked, pieces and sand spilled.  Reason is a mystery.  This is very fine sand, like powder.

I shifted some of the sand to a PET bottle and thought of using it for some purpose. There you saw the sand bag paperweight. 

Since that sand is so fine, I also plan to make one of my favourite things - an hour glass!  I have it on my to-do list since many years.  

Clothes hanger from TV antenna


In the 1980s, TV antenna in Mysore was a huge thing erected on top of the house.  It was long, wide and with 7 'elements' [directors] and one reflector.  Later when the TV transmission frequencies were changed, everyone who had to replace them with new and smaller antennas.  The aluminum pipes of the old one had only to be sold as junk.  Not me.  


Notice the smaller antenna on our house.  The old one was 5 to 6 times bigger!  Imagine the giant!

I had seen an indoor clothes hanger some time before, may be in Bombay [Mumbai].  Since our old antenna had long 'elements' this was suitable for making a clothes hanger and there was a need for one to hang dry the smaller clothes/garments indoors, esp. on wet rainy days.  I think this was in the early 90s when I made this. I have used all the nuts, bolts and clamps from the antenna. 

Observe the square tubes - two vertical and one horizontal forming the main 'frame'. Add the length of these three and gauge the length of the old antenna.   The longest 'element' [smaller round tube] in the set of seven stretched 8 feet across!  That was how big it was!  This was a common sight on houses that had TV!

This has been of great utility all these years. 

Tuesday, December 10, 2013

Scale cum cutter from broken parts

In the late 90s, computers had arrived in offices, including ours.  One computer monitor [tube type] had a narrow door for operating its controls.  It swung open on two slender pivots.  After some wear and tear, this fibre door had come off.  It was like a ruler. So I thought of making use of it as a ruler.  A computer part came packed with something later.  I was looking through some boxes.  There was an unusual object, orange coloured with nice smooth edges. The boxes were kept for disposal.  A 100 Watt bulb lighted up in the mind.  I picked it up.

I had somewhere, probably in some engineer's office, seen a gripping handle for a scale.  What a beautiful idea I had thought, so much easier to lift and move the flat object from paper.  This orange coloured object perfectly suited as a handle for the scale.  I stuck it to the fibre scale using strong adhesive [Araldite].


This also serves me as a tearing blade as one edge had a slight taper, much to my liking.  This enables me to press-hold the paper and tear the other portion neatly.  I clearly marked the ruler in inches which is very handy.  It is 10.5 inches.

 Just for kicks, I wrote my name in dots in the groovy pattern on the other side of the scale.  This can also be displayed, the new 'grip handle' serves as a stand!  I did this part just by instinct and with no real purpose as I do not display the name!


This is yet another of my satisfying little projects.  I still use it while it also serves as a paper weight. 


This special scale has become an indispensable tool on my work desk and one of my favourites.

Monday, December 9, 2013

Stone slabs go into a pavement

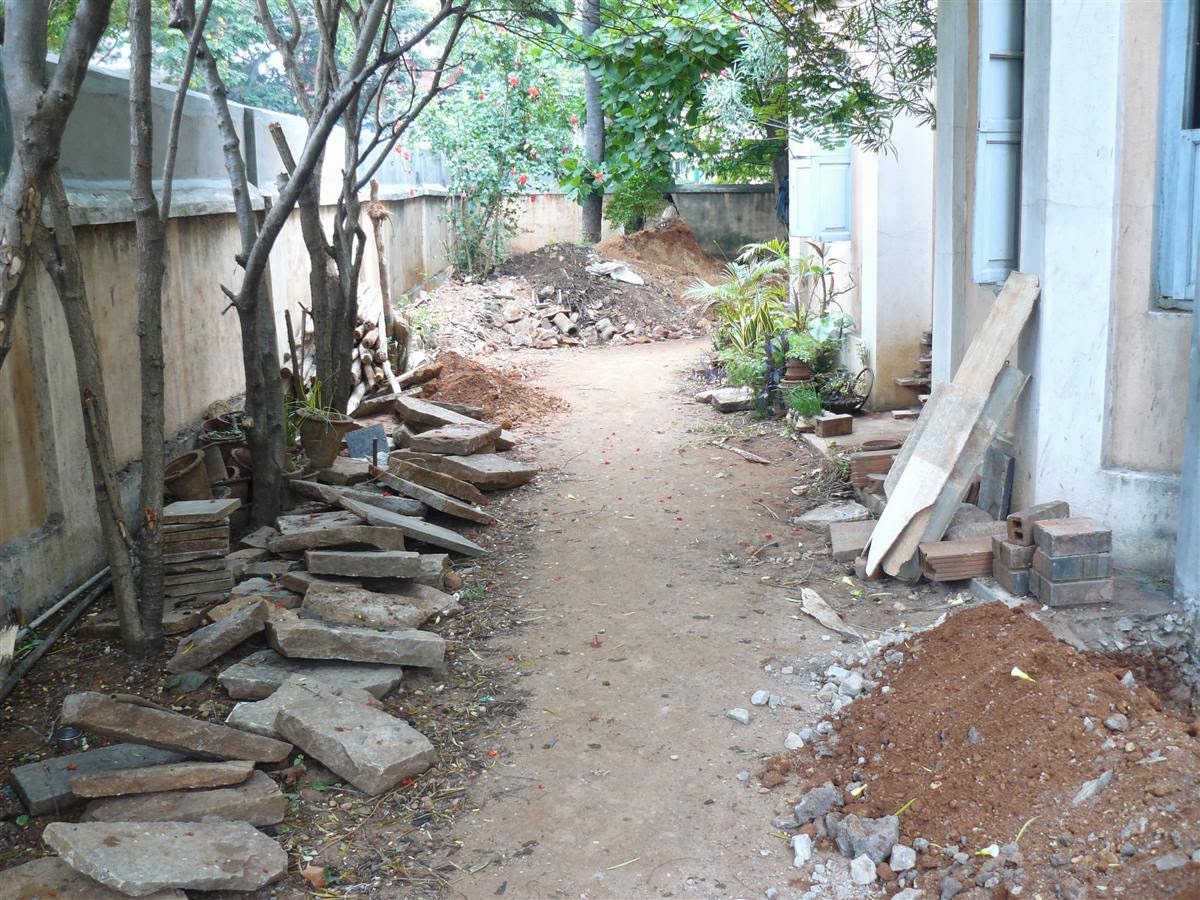
There were many granite stone slabs salvaged from the floors and portions of the 100-year old house that was divided into two equal portions 4 years ago.  I managed to pull up dozens of them for reuse in my portion.  


They were of various thicknesses and dimensions as can be seen in these 2008 photos.  


This portion was later paved with longer stones, which had to be removed after just two years.  


[Picture 2008, being laid].  The new house had not been thought of at that time. 

The odd ones were given for covering the passage floor in the adjacent new house in our portion that was built recently.  With that, much of the stone junk was gone.  But many were retained for better use.  Besides the granite stone slabs, I had salvaged many lovely Cuddapa slabs [seen stacked in the picture below] also that were used as floor of the dilapidated room that was pulled down to build that new house.  I  had got them cut from the stone smith who had to be called in for this emergency work which he is attending in this picture.  But after he did some work that eventually was a flop in the project, I got these Cuddapa slabs cut neatly disposing off the unwanted ones with the debris. 


One good, wide slab was cracked.  So I it used it in the floor of the 'tools shed' I built [another post] from mostly junk material. I arranged the neater ones in full size as floor in the tile-roofed open shed adjacent to the tools shed.  This is visible in one picture below. In front of this is the passage from our back door.  This passage ground had to be paved as most of the water coming out of the open yard was let out here and the walls are showing dampness because the soil is always moist. I had put the slabs as stepping stones as a temporary measure and had not found time for doing it neatly.  Last week, I picked up that project, staying away from work, and completing it. 

This is the passage. See those two slabs placed side by side. That is the area.  The shed frame is ready. Picture taken when work was incomplete. The better Cuddapa slabs were used as floor to that shed. 


See the shed, now having roof. See the slabs lined up. The Yarden space is also visible.  


This is the eye-level view - taken at the same time as above, 2011.


It was a small area.  It took me a full day as I had to do all the work myself.  For this, I had the small gravel saved and kept.  River sand left over from the house construction was also available.  Now I had time on hand.  Only thing was cement which I bought that morning.  43-grade Coromandel Cement, one bag.

After removing all the slabs haphazardly paved as it was a temporary measure, I checked the level of the ground for a slope in the desired direction.  I chose the slabs to lay them in a neat fashion.  This is a new picture taken just after I had placed the main slabs. Picture from the other side of the path. Door of the new house visible in the background.


The junk shed floor is behind me as I am engaged in this new project. The tools shed is just out of the frame on the left.  Tea was supplied to the spot. Do not miss to spot it!


Concrete was filled into the gaps first leaving a quarter inch at the top for nice cement-sand mix to finish neatly.  Concrete was pounded in with a hammer so that it is firmly based into the soil.


This is another dose of tea as I take a picture of the finished project. Notice the long flat cement work on the right.  I have made a very shallow drain so that rainwater or any water runs along it to reach the jasmine plant's base. I will see later if there is a real need to continue the concreting further in the pathway. I have also kept the rain barrel on the right - the brick base for it can be seen.   Barrel/tank has been kept away to facilitate work.


Finally, I did this, having felt a great necessity particularly for this portion. 

Tuesday, October 15, 2013

Plastic can into dust pan!

After painters used up cans of thinner, I tried this idea of making the cans into dust pans.  Some months ago I had seen a similar idea on www.pinterest.com, a website which has already become popular now.  This is what I had seen.


There are a couple of other unwanted bigger plastic cans I may cut up like this some day.  But this one is an experimental sample! The cans are of poor quality.  This is what I made.


Even the other portion would serve the same purpose. The entire work took hardly ten minutes.  Usually, the empty cans are disposed of in the trash, which are picked up by the rag-pickers who earn a small sum out of such things.  Finally they go up into recycling cheap plastic, again. They are made from such plastic, particularly this one. 

Thursday, September 5, 2013

Table from a chair!

Our neighbour was discarding many old materials many years ago to get rid of unwanted stuff from their attic. Among a few other kitchen items we also got for free, we took a set of teak wood legs that formed the frame of some sort of a relaxation chair. I don't know how the chair would have looked like with its canvas seat and back rest which seemed to hang on cylindrical pieces across. I am not too sure about arm rests and the angle it provided for the back. It must have been like a box with one side open! But the four legs and a couple of those cylindrical pieces were handy, just fine to make a small desk.


Later when the computer came to our house, there was no proper table to keep it.  I was using a small desk for this purpose but it cried for more space.  

I had by then two long planks of wood available. I thought this was the best dimension for a table that would also fit in a place in the room too.  Long pieces of wood, removed from another bookshelf when it was reshaped was available. I thought of the four legs from the 'Gopinath Chair' [name of the person who used it] at this stage and they seemed the proper height.  Materials ready, idea in place, work started. 

There was no need for screws but just nails were sufficient to join the parts because of its temporariness and a fixed place. Within two hours, the table frame was in its chosen place. Two planks formed the table top.  No fixing.  Just kept in place. I did not use the saw at all. All pieces of wood were just the right size. The cylindrical pieces went into their old slots already there. Voila! 

Perfect!  I kept leg/knee space free for sitting close to the desk on our chair and even stretch the legs comfortably.  A footstool was made from legs and a bottom plank I cut to shorten the height of a rosewood teapoy.  Very comfortable.  The chair is ready made and so not featured here. The table was made 5 years ago.  It has been so useful till date.