Friday, January 18, 2013

Shelf from shelf shutters!

A small old dilapidated structure was brought down 3 years ago. There was a small shelf built in brick which was also dismantled.  I looked for any picture I might have taken before that, but this shelf was out of frame in the one shot. So no picture to show its original location.  Its wooden planks and wooden shutters of teak were saved.  They were lying around asking for reuse.

In my room, I needed a rack to keep some books and other items to fit in the space beside a window bay. Only recently, the idea that this pair of shutters might suit this project flashed like lightning when I had woken up at about 3 a.m.  I do not know from where this came from!

The height of the shutters were about 4 feet and to fit that space it required a width of 24".  The plank available was just perfect because I did not want to cut the teak plank.  I thought of using a couple of cracked planks as shelves, but I decided it was not a good idea.  Instead I looked around if there were some plywood from another project.  I found some quarter-inch thick plywood, which was left over.  Its 'ready-width' of 22" also suited me!  So I cut up the size from that board.  

For the top, I used the original plank as it was.  But there was a slight shortfall towards the top front.   A broken plank [from another such shelf] which had cracked along a curved grain was used after properly shaping it. It can be seen in the picture below, lying on the ground.  It came nicely to my own satisfaction.  For the back, I used some old hard board which was also left over from some other project.  I have used only nails to assemble this rack.  I had to screw in four plastic bushes at the bottom to allow the broom to push the dirt from the gap.  Now some pictures.


Ready to go into place.  It surely needs to be painted. 


Placed. Don't get distracted by the 'stand-out' rosewood rack.  Look beside it.


Top plank piece shaped.

Sunday, January 13, 2013

Vintage Writing Desk unjunked

I was the only one who climbed the attic in the old house.  Clearance to the roof was so low, that sitting on haunches, the head would touch the roof.  It was a deep and dusty attic built of wood on the worship room. It was accessible at the kitchen. A shelf placed there served as a ladder to climb up. Whenever there was a need to take out the huge brass vessels [once used in the large family itself daily!] for cooking  before a large gathering arranged at our house, I was summoned to climb and also later to keep them back.   Many of the items 'dumped' there were perhaps untouched since 1950 when my grandfather had moved in to that house.  I used to take that opportunity to look for curious things I had never seen.  

One such thing was a writing desk that belonged to my great grandfather.  The person using the desk squatted on the floor in front of it while it held papers, pens and ink. The writing plank was a shutter to the contents and it could be locked too.  I have grabbed an image from the web to show how it was: 


I brought it down.  One of its four legs was already missing.  I found out it was of rosewood and really old. It must have been an item my great grandfather used since his childhood in the 19th century, or so I thought.  The 'writing' plank was also broken.  But only the drawer portion with two brass handles was fine.  The smoothness of operation of the draw itself is testimony to the workmanship and also the amount of use it has undergone with my ancestor. It seemed to have lived its full service life.  

But I still saw some life in the lovely drawer. 

After thinking and thinking how to use it, I got a wonderful idea.  At the same time, I was yearning for a drawer to my old desk where I needed to keep my pencils, erasers and pens. Necessity is the mother of brilliant ideas, right?  

So what I did?  It was on 15.2.1991 [recorded in the draw liner by me!]  I measured the width of the draw, cut up the horizontal piece from the desk to fit it.  I used 'L' brackets below the desk to hold the unit in place. By doing this, I increased the utility value of my desk manifold.  I retained two of its back legs as if 'hanging down', one of which is visible in this picture. 


The original lock was missing.  Old brass handles.  It is a pleasure to operate the draw!


That slanting desk had a portion that had 8 little compartments a la an elephant stable.  I was using this on the wall for sometime to keep electric bulbs, one bulb fitted in one compartment. Now it has gone back to the junk box.  But this 'drawer idea' is one of my favorites.   

Two legs are intact and one was missing, right?  I forgot to tell what I made with the third one that I had to cut because it would hurt my knee when I sat at the desk.  A few years ago, it found some use:


Handle.  The bell is a vintage bronze cup!  Produces nice and loud vibrations!

Saturday, January 12, 2013

A little photo I rescued


I post this today, 12th January, 2013, the 150th Birth Anniversary of Swami Vivekananda [12.1.1863 to 4.7.1902].  Grand celebrations in memory of the Great Monk is being held in many parts of the world.   But in the morning, I was saddened to see [in front of my house] many school children being taken in processions on the streets holding placards with some messages.  Public stunts by schools or so I thought, and what a cheap way!!  What do they do with those placards?  They throw them into garbage and burn. Was that what the Swami wished?  Where are the schools heading to?  Let it be, but this post is about a picture of the Monk I found at home.

Many old framed pictures from the turn of the early decades of the 20th century were lying in the attic in a wooden box. Imagine 30-40 pictures of all sizes being displayed on walls of homes in the days of yore!! They had been removed as they were not found relevant by my forefathers.  One day, about 15 years ago, I dove into it in an effort to discard some really bad and damaged ones.  Some had their glasses broken also.  

Among the smaller ones, I found this. There was a nail on the wall of a dark passage in our old home and I had simply hung it there during that operation.  Some years later, I happened to lay my hands on it and took it out to wipe it clean.  I got goosebumps when the 'signature' of the man in the picture was noticed!   I knew it was Swami Vivekananda and that was why I had taken it out and hung.  Now suddenly it deserved a better place than a dark passage! 

I found another frame which was neat, old and good and it suited the picture's proportions. I reframed it into this.  The pose in the picture is a popular one now available all over the net. 

In all likelihood, this was from my great grandfather's time around the turn of the 19th century.  The picture could have been taken in Chicago in 1893 when he attended the Religous Conference [and made a very famous speech] there. It must have been mounted by "Harrison", in Chicago itself going by the name printed on it.  The 'signature' on it looks 'originalish', but it could be a printed fascimile.  I do not know.  Anyhow, now it is displayed in a proper place at home and the frame is befitting its 'vintageness'.  

I cannot imagine it was junked that way.  I found satisfaction in 'unjunking' it and more of it while bragging [read blogging] about it on his 150th Birth Anniversary.  You saw the picture at the top.

~~~~

Just to mention that the Swami had visited Mysore in 1891 before he attended that conference and had stayed in a building called "Niranjana Mutt".  It has been restored now, but this picture is before/during renovation taken in 2011.  


For that tour to Chicago, our Mysore Maharaja, H.H.Chamarajendra Wadiyar had made donations to aid his travel.  They also had a letter correspondence.
~~~~~

Toy Monkey on a Spring

During the 1960s and 70s, there was a simple, cheap and popular toy esp. sold at Mysore's famous Dasara Exhibition [annual event, on which I have made a separate blogpost - Click on this: http://bit.ly/VSraaI ].  The components of this toy, created by some unknown ingenious person somewhere, were merely a bicycle spoke, probably a ball pen spring and a little plastic monkey which was molded for that.  A few sand grains inside it would produce a rattling sound, just for effect.

Likelihood of anyone saving even one 'original' sample from those times is nil.  So I thought of manufacturing one now, about 40 years after, just for 'old times sake'.  I could get the spring and a bicycle spoke and substituted something else to do the 'monkey role'. I found out during trial and error that there is a fine balance necessary between the tension of the spring and the weight of the 'dancing monkey'.   I had to try different springs from my 'junk pen box' and using some clay to get the right weight!  


You must imagine the monkey to be holding the spring and to visualize its tail curved like a 'U" behind it...it would be funny.  Sorry I could not make it when the images were captured.

My happiness jumped like a monkey when my new toy worked like 'old times'!!  I had to make a video for the present generation.  Watch this:

<iframe width="420" height="315" src="http://www.youtube.com/embed/tBqcQ_2D73s" frameborder="0" allowfullscreen></iframe>

Now I preserve this in my 'shoe box'!  
~~~~~~~~~~

This is the real monkey - just imagine this scene.  A shot I took of my favourite animal near the foothills of Chamundi Hills.


Friday, December 21, 2012

Wooden Latch-lock

This is supposed to OUR 'secret' lock, accessible through the hole in the gate.  I had to make this because locking the gate does not suit.  It is to prevent or make it difficult for people who 'intrude' into the compound while we are away.  It is because many do not close back the gate while they go out and the stray cattle may enjoy my plants. So I thought it is better to deter their entry with this.  Postman, Courier-man, electric meter reader, water meter reader, gas cylinderwala and it can be anyone.  

It is a simple arrangement that we can operate with one hand through the gap in the gate, standing outside it.  Of course, we can lock it from inside too.  An old hook, a hinge, a few screws and a few wooden pieces were all that were required for this project. I had to use two base pieces of wood and they were shaped to fit in the gap between the metal sheet and a support bar of the gate so that they were tightly in place. Pictures are explanatory. 


Gate as seen from inside. 


Open position allows normal circular movement of the latch. 


Now seen in close or lock position.  The wooden piece fitted to a hinge is turned to stop the latch from rotating.  This wooden piece required a stopper. So it was another wooden piece, operates like a hook but stops the other piece on the hinge from opening. To open it, this has to be lifted up.  I fitted a hook which has to be opened first. 


The locked system in place.


This is the open position. The horizontal piece now sits on the smaller block.

Steps: Open the metal hook, lift the wooden hook, turn the other wooden piece on its hinge and then leave the wooden hook to rest.

This is a modified version of the previous one in place made of stiff wire.  It was done in a hurry 2 years ago and needed a better arrangement.  Wanted to do on the same lines, but as I was scratching my head, this new idea fell out!

I've to wait and see how tough it would be for intruders who may use their brains to barge in.  They can only feel the weird thing from outside if they try.  If they manage to come in, they are sure to look at the arrangement as this could be the only kind in the world!  I cannot help if they still leave the gate open and go away!  If gates are open cows may enter our garden and enjoy the greens, a horrible sight to see!

Tuesday, December 11, 2012

Termite Sculptures

What if Captain Haddock from Tintin comics got troubled by the terrible termites.  What curses he would have mouthed at them?  


Termites are home owners' foe.  But nothing in Nature is 'unpurposefully created'.  They aerate the earth with their underground channels. We are living in their land!  Here is a brief list of ten facts about termites. [Click to read, informative].

I only imitate Captain Haddock with just a couple of curses when I see termites damaging wood and paper at home or in the Yarden.  They can do immense damage.  They can even reach wooden rafters and reapers as I noticed in our century old tiled roof. It was 20 feet high.  I wondered how they went so high rising 'through' the walls!  But when another old smaller structure in the premise was demolished, their handiwork was on view. Let me show some pictures. 


Removal of roof tiles exposed the work of termites on rafters resting on walls.


Look at the reaper. Teak is said to be termite resistant because they do not like the oil in it.  When the oil dries up with ageing of wood, they will be vulnerable.


There were many rafters eaten up by termites and some were precariously close to collapsing! 
This one had been lowered carefully and I observed something here!! So I asked the carpenter to cut the portion carefully.  Then I happened to find many damaged ones in the lot and set aside all those that had some appeal, before the wood was taken for resizing for reusing the fine teak wood required for the new house that has now come up.  
I had kept the others aside, as if on display. 


Now this is what I created from the great sculptures created clandestinely in the walls by the 'thundering termites'.  The set becomes a part of my Yarden. I nailed all of them in line to a termite damaged reaper which formed a base and rested on two nails on the wall. There was another termite torn plank that also went up on show.  The badly defaced pieces were used for the hot water boiler as fuel.

This is the 'Sculptor'. Many thousands of them will be working on shift basis!

Group Picture! Closer view of my latest 'Junk Project'.  That was the purpose of this post.

~~~~~

Now let me show how dangerous and what a nuisance these can be.  There is no guarantee of any wood or item containing cellulose to survive.  If they are not moved or noticed, they can eat up the whole thing.  This was a 2 1/2 inch 'Termite Tower' risen from a little crack in our room floor.  They had completely eaten the books in a book shelf that was not noticed for about 2 months!  Many books were lost that way. They had come up through the wall and the shelf was embedded in the wall.

Some wood kept for a week were attacked. Look how they come up through the gaps in the floor. 

A toy bat had a lot of cellulose!! 


A simple trellis I made was damaged some years ago.

They attack the bark of trees.  

An old wooden tub attacked from its base, despite keeping on bricks. Since it was noticed soon, it could be saved.


An old radio cabinet, junked but not disposed, suffered.  They had come through the crack in the old wall.

A piece of torn rattan from a junked chair deliberately kept on the ground to see if they attacked, was surely attacked - in 4 days!

As such, I do not use much wood that touches the ground, in my Yarden.

Sunday, November 11, 2012

Wind Chimes, bells and 'tings' like that!

Ting... ting... ding... ding... dong... tung..... I just love to hear those pleasing sounds. Old telephones had those melodiously sounding bells.  How I miss them, even though we did not have it at home!

I had not known the name 'wind chime' in the early 1970s when I made my first wind chime.  There was a tubular wind chime in someone's house that produced a most delightful melody. It must have been an imported one.  I wondered if I got something that could 'ting', I could make such ones too, or so I had thought then!

We had bought some small bronze cymbals, more as toys than for using in the worship room. Two pairs, each attached with a string.  


This was during our trip to Gokarna in 1969-70.   These were found at odd places, carelessly neglected.  It used to get entangled with other things and when they were taken out or fall down on the hard floor and make a pleasing 'ting'!

Since I wanted to make a wind chime myself from things that I had, lo, there was a 'ting' in my head!  These cymbals were my first objects of my wind chime project.  I had used all the four cymbals earlier - spacing was tricky.  I had used a brass ring of an electric bulb holder [see in the pic below] to strike them.  To catch the wind, I had hung the thin foil that was used to seal tins - in my case, it was a 'Bournvita' tin foil which I had cut up when opening it, neatly.  I have since remodeled it and used only two and lost two, know not where and how.


I was at a shop in the market place two years ago when I found the sound from this wind chime [picture below] too pleasing.  Just bought it! 


Another one, but less pleasing.  Poor buy. This is a somewhat a junk in itself. The thin tubes does not resonate well.  


The 'U' you see here [below] is from a broken lock.  It hangs free, on our main door frame.  The bell is fixed to the door shutter.  When the door is opened, it hits the 'u' and the bell 'tings'!  We can hear this in the rooms. Just to know that someone is moving in or out of the door!


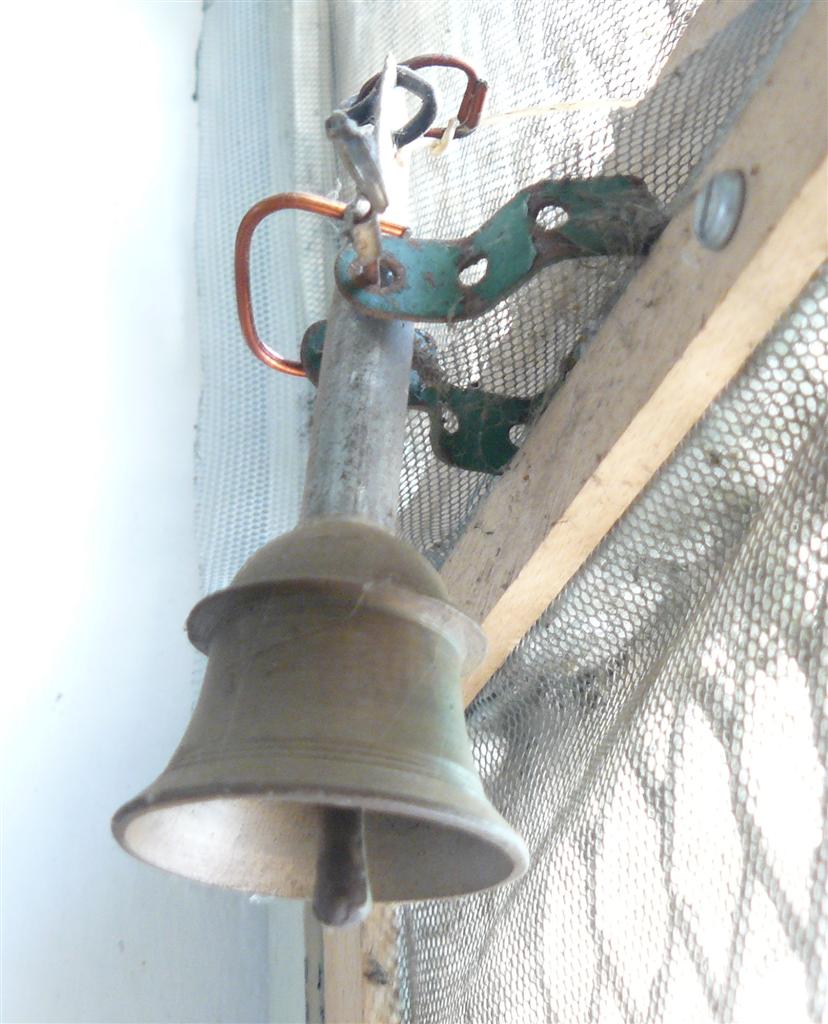
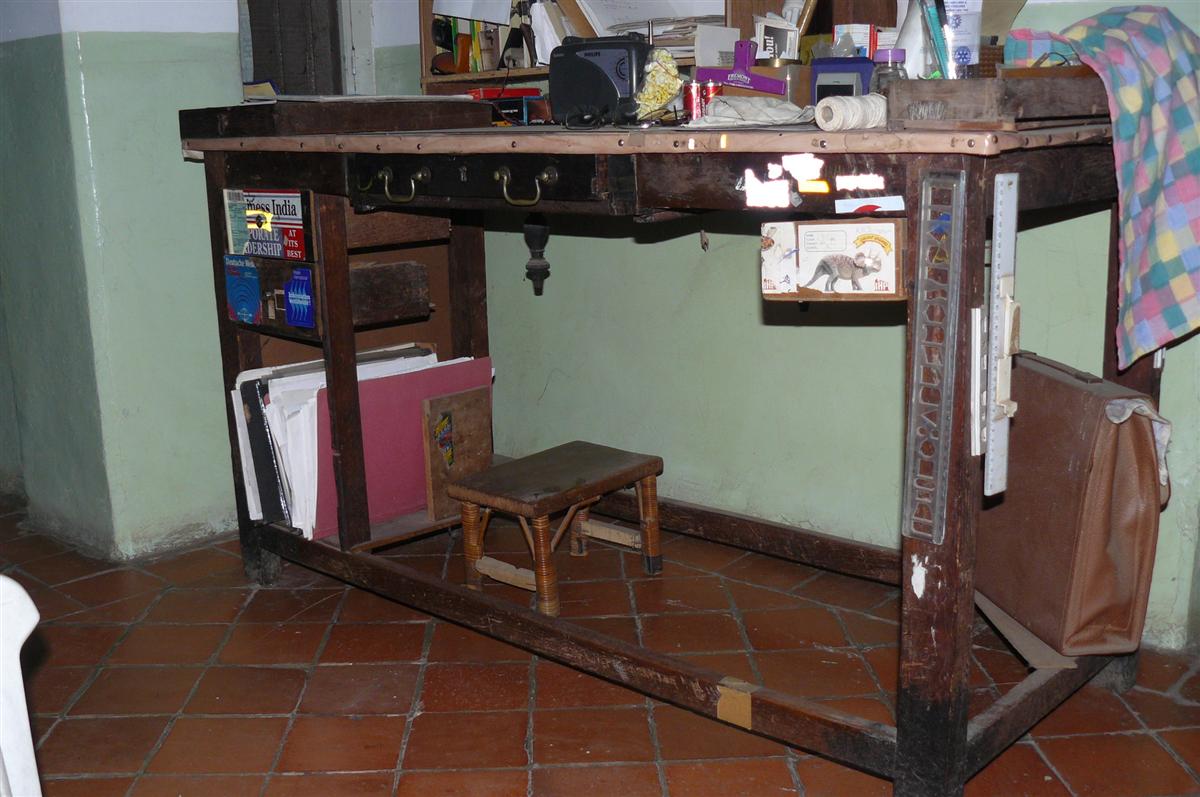
The broken leg of a century old writing desk became the handle of this bell.  A bronze cup that was in the attic became the gong!  It produces a beautiful sound.  The writing desk was used by men sitting on the ground doing their work. They were in many homes. This desk was in poor shape with one of the four legs already missing and  was in the attic.


Some brass cups [tumblers, as we call - picture below] were lying unused in the attic.  If they are sold, we are not profited. So, I picked up the oval wooden board - which my grandfather made in his college days [1920] for his carpentry project!  It was used by my grandmother for many years to roll chapaties. It was worn out, but still usable. I fixed these cups using screws after making holes.  Hung rings from a small thread to strike the edges when the entire board is shaken. It is connected to a thread outside the main door.  This becomes one of the 'calling bells'. Together, they make a good sound.  This was inspired by my childhood memory I still carry of a particular pair of doors inside the Nanjangud Temple. When we visited there, I used to go and shake the doors [locked] and tens of bronze bells fixed to that trellis-like door produced a great sound.  Children got lot of pleasure doing it, in those peaceful days.  I still wonder why that small temple beside the main deity was locked. It had an idol inside.


Door curtain tubes were found useless when I replaced them with curtain springs. I wanted to make my own tube wind chime that resonated nicely.  It worked!  Steel pipes, chrome plated and rusted. Made small holes to hang them vertically.  Wires used for hanging prevents vibrations, but thin thread has to be used to get the full vibrations. Nice wind chime!  Disturbed my mother's sleep - it was in the yard.  So had to shift it away.


Bicycle bells wind chime.  Old junked bells, very old junked and rusted strainer [deep frying].  Bent the handle of this to hang.  Used the existing holes to suitably space the hang of the bells.  Each bell vibrates in a different frequency.  This is also in the yard where there is good breeze.  Steel links of a 'chain swing' I made 2 years ago strike the bells. The wind is picked up by a coconut shell and two plastic caps.


This is another of my favourite little calling bell at the main door. Pic below. A thread [actually a tennis racket gut] is left outside the door to pull.  It is hung this way. I've used a piece of toy 'meccano' and stiff wire as 'axle'.  This bronze bell - famous in the house as 'Dinu's bell - was my toy 50 years ago and produces a very pleasing sound.  Its original handle had broken about 40 years ago.  This handle-less bell was kept here and there!  I made a handle, from a piece of aluminum tube and is now in good use as you can see below.


A few old computer printers had been junked at the workplace.  I picked up the square rods from their paper feeding units.  Using the tiny hole, I tried to ting by holding it with a pin.  There was a very soft and pleasing 'ting' when I struck it.  Slender cotton thread for  hanging them gives best results as it does not absorb the vibrations. The striker is a steel ring I salvaged from a torn vanity bag.  For catching wind, I have used a piece of balsa wood that is light weight.  A long thread and heavier weight will make it oscillate more often.


One more wind chime I made from a spoiled 'ding-dong' electric bell.  The plates are the ones that vibrate.  I hung them with thread and put paper pieces to keep the hung threads above the hole away from the plate. If it touches, it affects the free vibration.  I used a steel ring from a discarded vanity bag as striker.  I have hung this ring in such a way that there is some imbalance which would make it oscillate more times.  The wind catcher thread and the hung thread are tied on the same half of the ring.  It produces pleasing 'tings'.


I'm fond of anything,
That will 'ting'.
~~~~~~~~~~~